
Every time a holiday rolls around, banks and credit unions across the country take to Facebook and Twitter to send out festive greetings. We think that’s a great practice and definitely recommend it, but one question remains…
How many of your customers or members are you actually reaching on Facebook and Twitter?
Let’s say you’re a community bank with 30,000 customers and 1,000 Facebook fans. Let’s say that Facebook allows 10% of your fans, or less, to see your holiday greeting.
That’s not a lot of people.
The good news is that you have the power to reach a much larger audience through email. That means you can reach a lot more than 100 people with your holiday greeting and branch hours update.
The even better news is that we’ve done all the work for you.
So, if you’re up for it, in about an hour you can have custom holiday greetings scheduled to go out before every holiday, for an entire year.
That’s right.
It only takes “about an hour” to get a solid pair of new glasses from LensCrafters AND it also only takes about an hour to make sure that your customers or members know your branch hours right before every Federal Holiday throughout the year.
Can you imagine having a year’s worth of work done in about an hour? For Core iQ, it’s just another way to help you save a bunch of time.
Let’s walk through the process.
Build Templates
The first thing we’re going to want to do is build all of our templates in Core iQ. You don’t have to start here, but we’ve found that getting all of our templates built and approved in the system first is the most efficient way to build a schedule or campaign.
To start building my templates, I’m going to need to head over to my Template Library. To do that, I just need to click on “Communications” in the upper navigation, then “Communication Templates” in the dropdown menu.
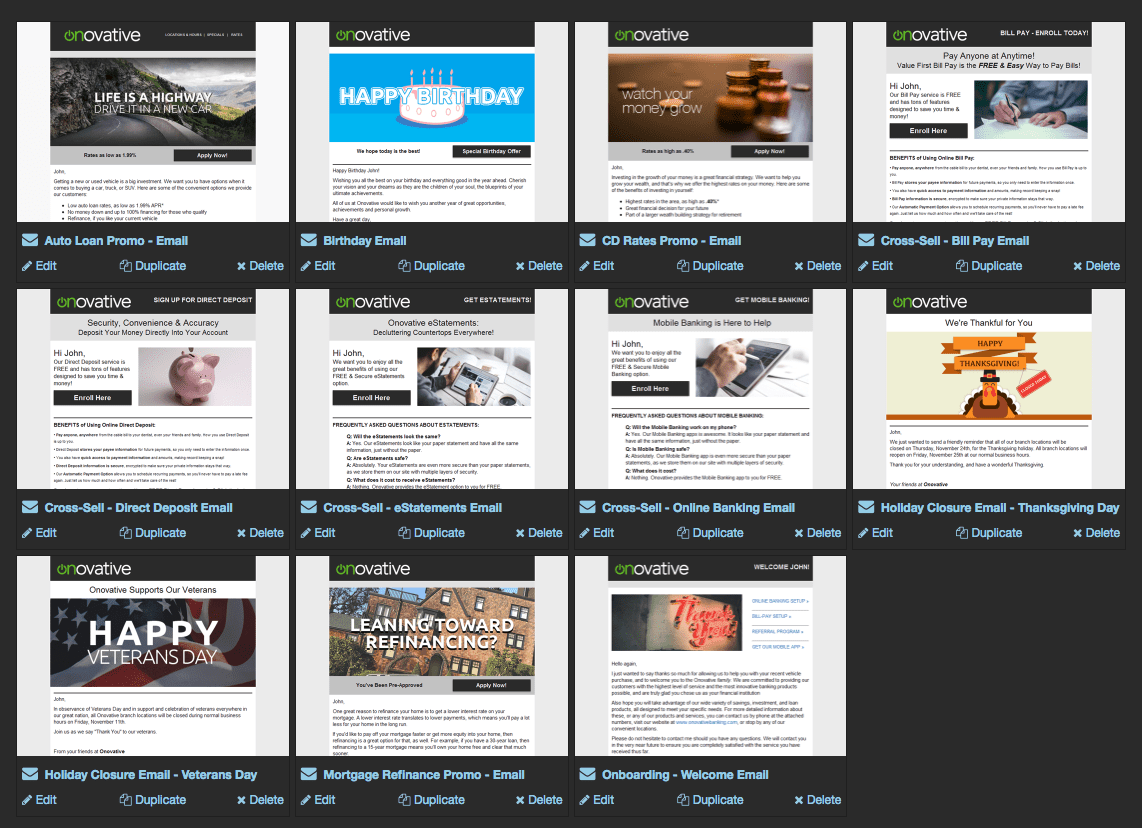
Once I’m in the Template Library, I have a couple options here.
If I already have a template layout that I like, I can just duplicate it here. This is the easiest way to build new templates because all you have to usually do is swap out an image and the copy, give it a new name, and you’re done.
Presto, new template.
You can also create a new template from scratch, but in this case I already have an email layout that I like and want to use for my holiday communications.
PRO-TIP – All of the pre-built images that we’ve produced fit the email template layout with the 580 x 250 image. Feel free to use whatever layout that suits you best, but know that you have access to pre-sized images that fit this particular layout.
All I need to do here is find an email with the template layout that I like and click “Duplicate” to duplicate that template.
Then I’ll just need to click on the template to start editing it.
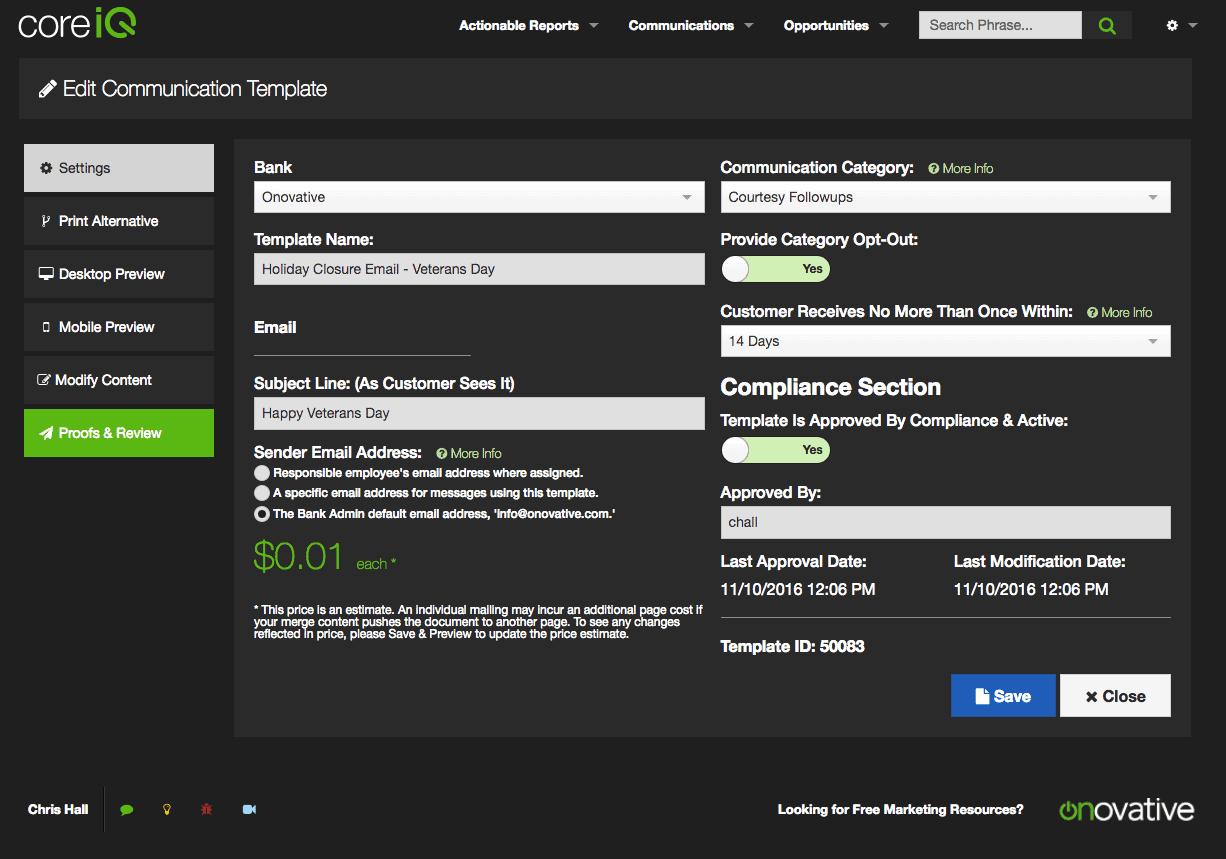
SETTINGS TAB
When I’m inside the email template, the Settings tab is where we’re going to put the Email subject line, set up who the email is coming from, its Communication Category, and eventually make it active within Core iQ.
Here’s some more detail.
Template Name: You can name your template whatever you’d like, but I’d like to suggest coming up with a naming convention here for one big reason.
That reason is that a naming convention will group all of your like templates together in dropdown menus, while also making them easier to search for in the Template Library.
I chose the naming convention, “Holiday Closure Email – Holiday Name”, but feel free to use whatever naming convention you like.
You may want to add a number before the holiday name to order your templates sequentially. But I’ll leave that up to you.
Subject Line: This is where I’m going to add the subject line for my email message. We’ve actually provided you with three potential subject lines for each holiday in our downloadable zip file, so be sure to check that out.
Sender Email Address: We have some options here with regards to the email address that the email will be coming from. I can have these communications look as though they’re coming from the customer’s assigned relationship, branch manager, or any individual employee.
Although there is nothing stopping you from sending personalized emails from your customer’s account manager, most of our customers choose to send these types of emails from the financial institution’s default, organizational email address.
Your call.
Communication Category: In this section, I’m going to define my holiday emails as a “Courtesy Follow-Up”. This category fits because we’re not trying to offer anything other than a greeting and a reminder of our holiday branch hours.
Compliance Section: It’s best to wait until all of your changes have been made in the template before having compliance switch the template to Active.
You can feel free to integrate your compliance workflow into Core iQ, in a flexible way. Whether you want to send the template directly to compliance or send an email proof to yourself, Core iQ has you covered.
Clicking on the green “Proofs and Review” button opens up a dropdown menu that provides some options. Take note that we’re also happy to take a look at your templates at no extra charge.
TEMPLATE ARTWORK TAB
There are a couple steps to adding an image to your email, but everything should be pretty straight forward. At the highest level, we’re going to be uploading the image we’d like to use into Core iQ. Then we’re going to copy the image link and paste that into the section of the email where we’d like the image to live.
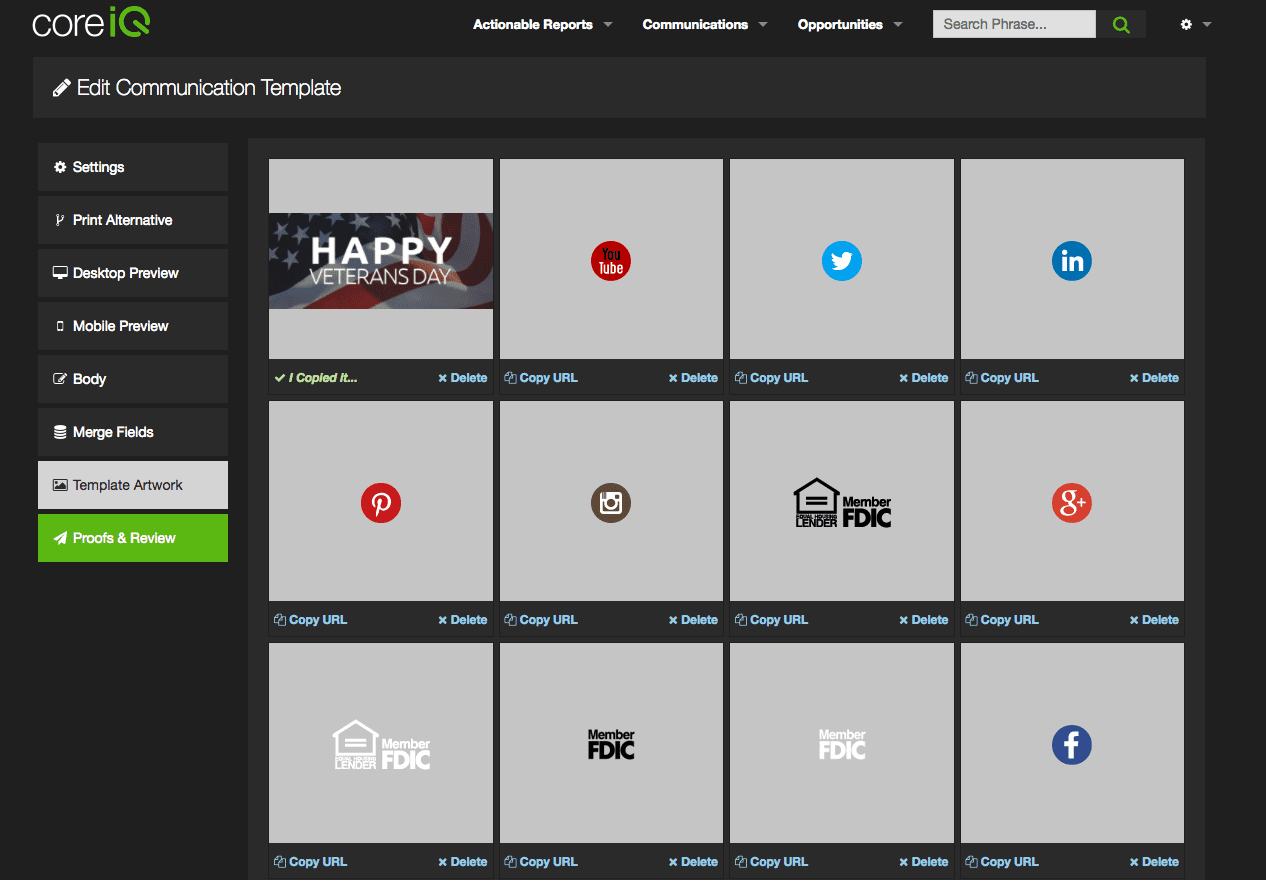
Upload an Image: The first thing I need to do is upload the image associated with this template. Scrolling down to the bottom of the Template Artwork screen reveals an option for me to “Select New Image to Upload”.
I decided to make my Veterans Day template first, because I’m a veteran… and I’ve selected a Veterans Day image that I really liked from the zip file.
Feel free to use any of our pre-sized images or bring your own in here, but make sure that they meet the image dimensions listed for the template you’re working with.
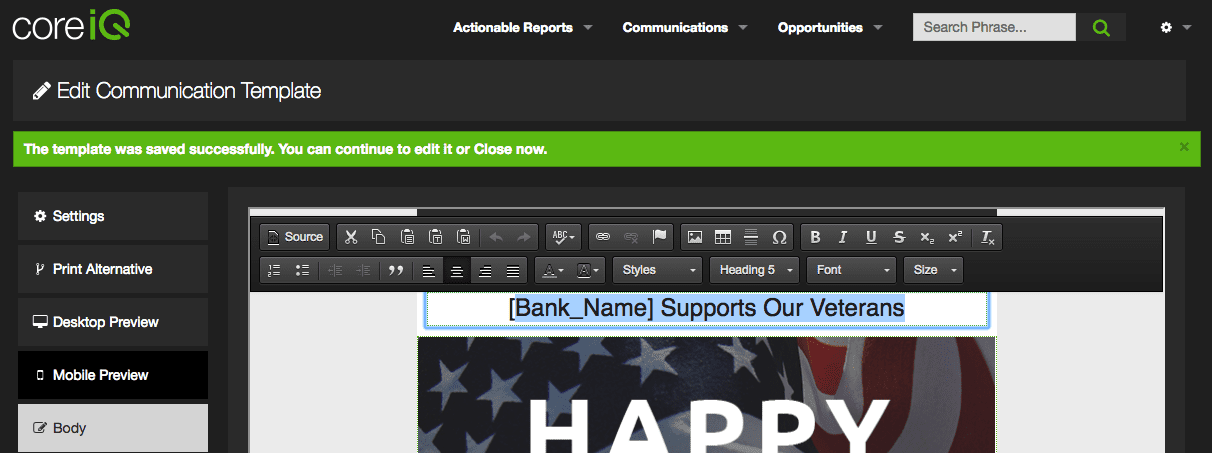
BODY TAB
Once our image has been uploaded, the Body tab is where we’re going to actually bring everything together. Using our zip file of pre-built titles and body copy should make things really easy.
Title: Choose from a number of different title options that we provided in our zip file, or create your own and type it here by clicking into the title box. I’ve used a merge field – to remind you that is an option.
The title is a great place to get the gist of your message across.
Image: To add or replace an image, I’ll first need to go to the Template Artwork tab and click on the “Copy URL” link underneath the image I want to use. Then, I’ll go back to the Body and click on the image section of the email template to bring up the online editor. Once the online editor comes up, I click on the image icon to add an image.
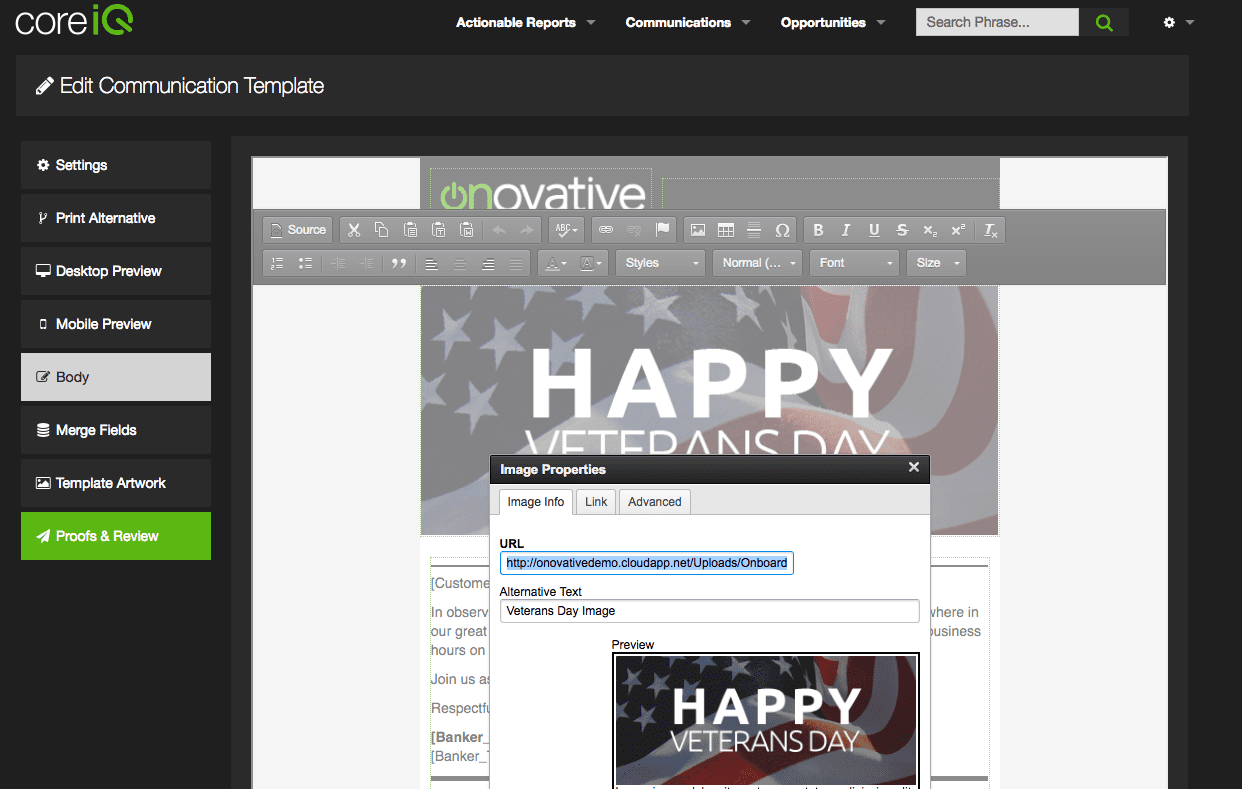
Next, I’m going to paste the URL I copied from the Template Artwork tab into the box asking for a URL and click the “OK” button. This connects the image I’ve saved in the Template Artwork tab with the Body of the email.
If everything worked, I’ll see my image in the section of the layout I was trying to place it.
Body Copy: My last step will be to add the body copy to my template. Clicking in that section will open up the template editor, and from here I can type in my own custom copy or paste and modify copy from another source altogether.
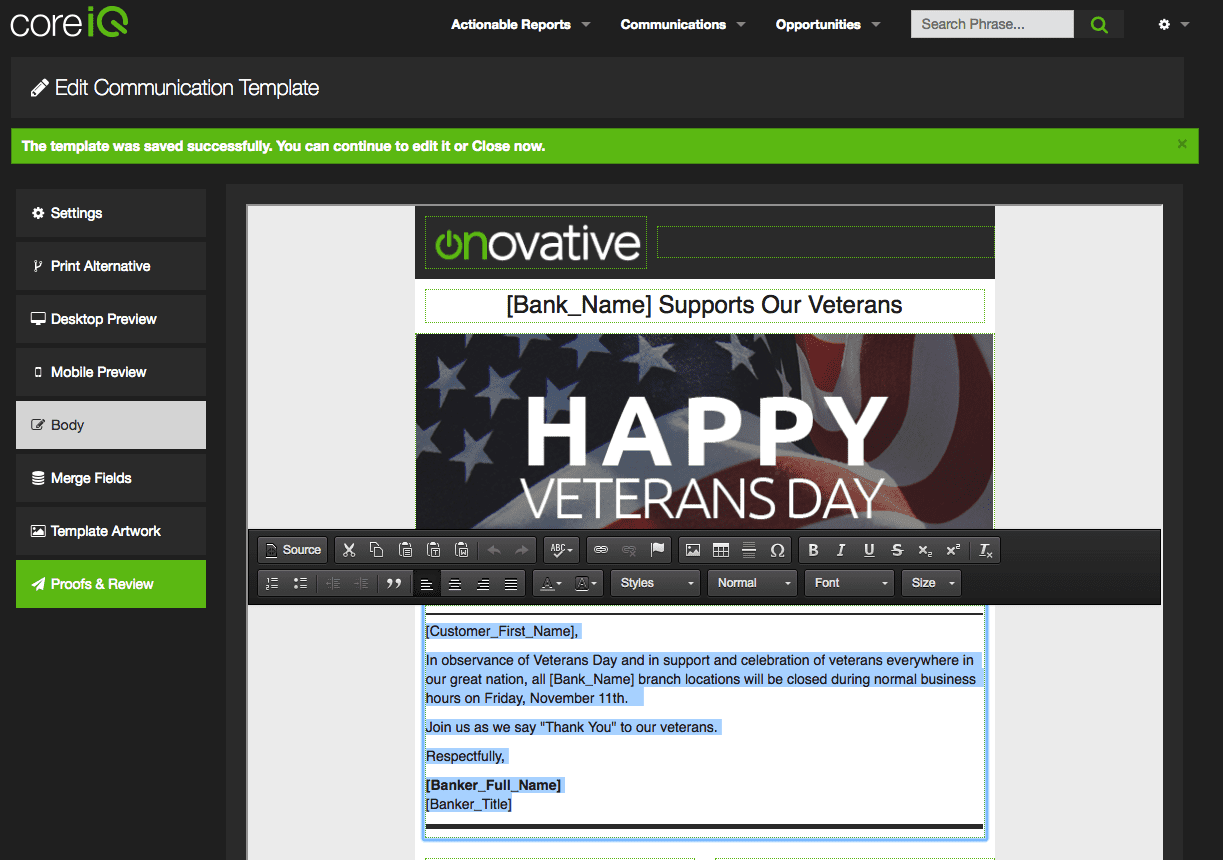
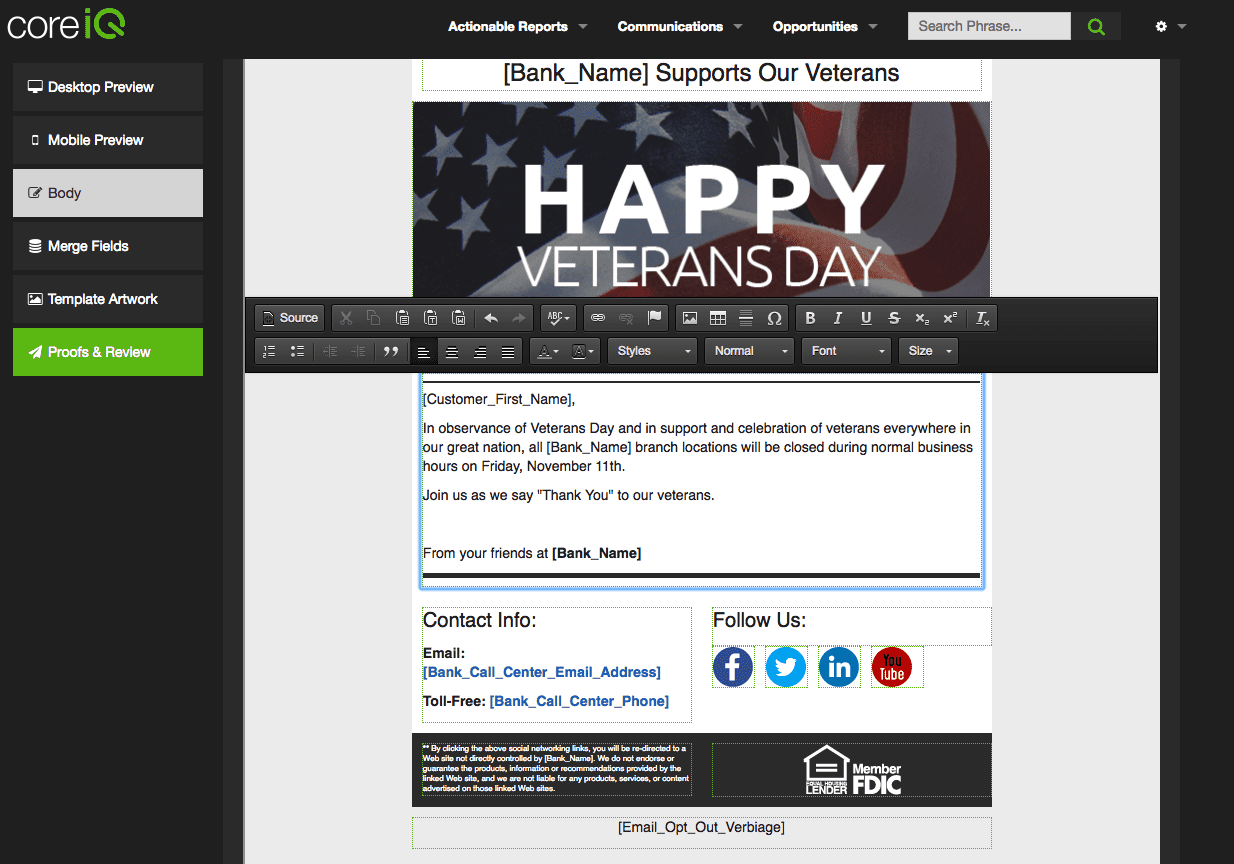
PRO-TIP – Make sure that your merge fields match the settings of “who the communication will be coming from”. If the email is coming from the financial institution’s default email address, then your closing salutation and merge fields should reflect that here in the body.
RINSE & REPEAT
Now that I have a great looking holiday email template for Veterans Day, I just need to duplicate this template and make a version for the other holidays for which I’d like to send emails.
Now I can focus on getting all of my templates approved through my compliance process…and while I’m waiting for that I can define my audience and build out my communication plan.
Build An Audience
With all of my templates built, the next thing I like to do is build my audience. When I’m building my audience, I’m defining the group of people that I want to receive certain automated communications.
We can start with the products the audience has or used to have, and we can also set up filters based on criteria like age, home branch, and balances if we want to get very specific.
To start building an audience, click on “Communications” in the upper navigation and select “Target Audience and Communications” from the dropdown menu.
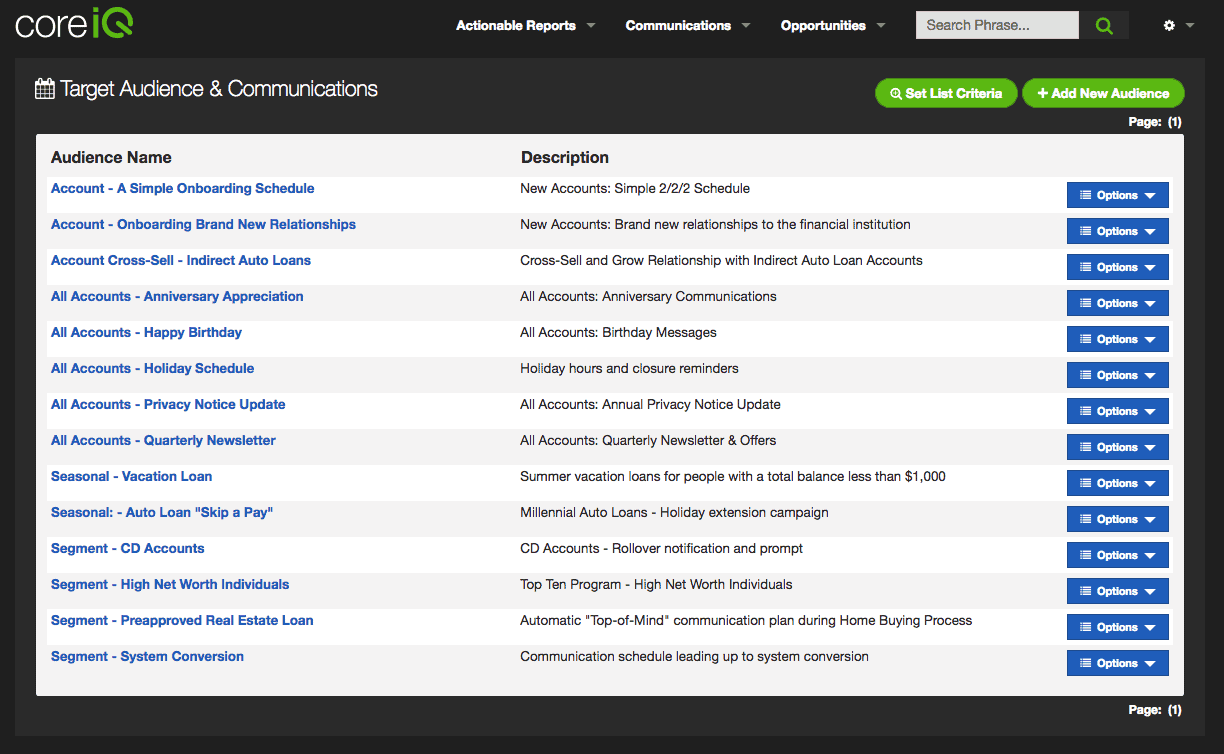
Once I’m on the “Target Audience and Communications” screen, I want to click on the “Add New Audience” button in the upper right-hand corner.
From here, I can name and describe my new audience.
PRO-TIP – I came up with the naming convention “All Accounts” before “Holiday Schedule” to keep this schedule grouped with other schedules that reach all accounts. Feel free to name and describe your audience however you see fit.
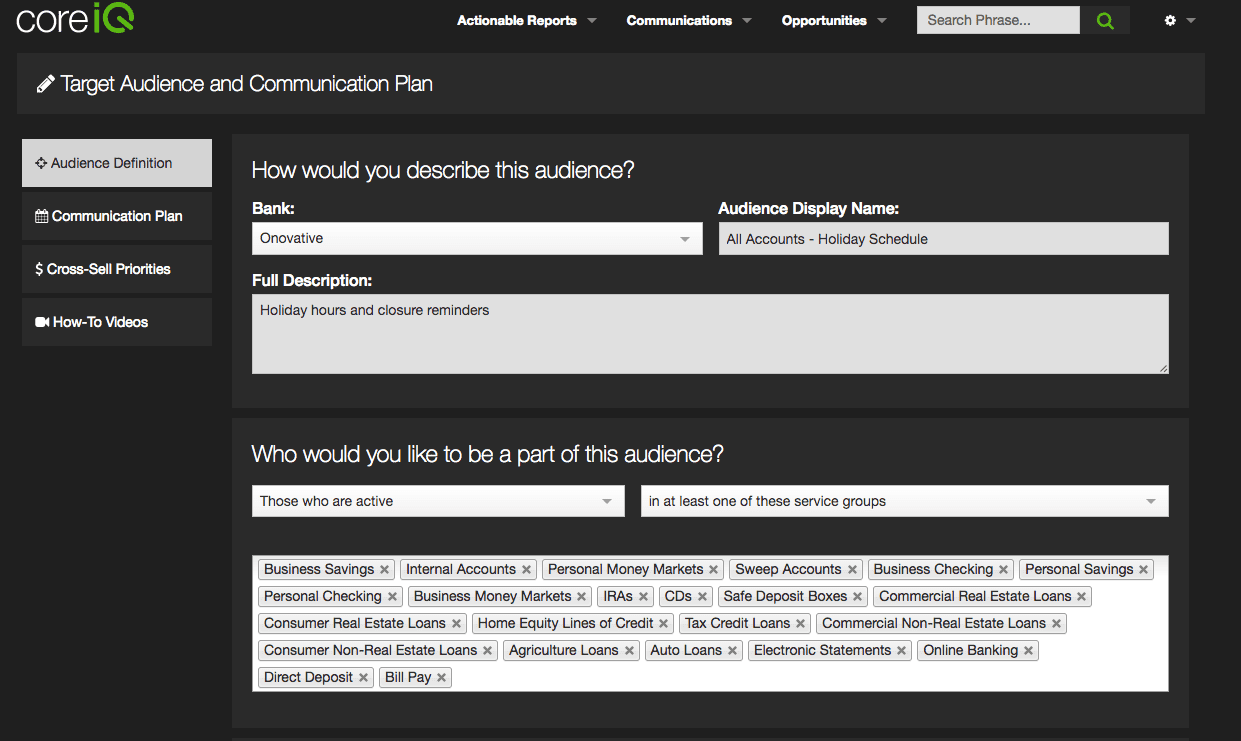
Now we’re going to need to define our audience based on the products that people have. In this case, I want to send an email to all of my customers or members that I’ve captured an email address from regardless of the product or service they have.
This way, everyone we have an email address for will be wished a happy holiday and notified of our holiday hours.
All I had to do was select “Those who are active” and “in at least one of these service groups” from the dropdown menus, and then I just selected every service group.
This way, if a customer or member has one product in any of our service groups, they’ll get a holiday email. Further, if people have more than one product in one service group, or across multiple service groups, they’ll only receive a single email from us.
Once I’m happy with the audience I’ve defined, I just need to click “Save” in the lower right-hand corner and I can move on to the Communication Plan.
Build The Communication Plan
The last thing that I need to do is build out my communication plan. If my templates have been approved through compliance already, then I’m about five to ten minutes from being done.
To start building a Communication Plan, I’m going to click on the “Communication Plan” tab in the left-hand navigation.
We should be looking at a blank schedule, so the next thing I want to do is click on the circle that says, “Add Scheduled Communication”.
There is no limit to the number of scheduled communications I can build in a Communication Plan. But in this case I know that there is a finite number of communications I need to schedule. So I should be in and out pretty quick.
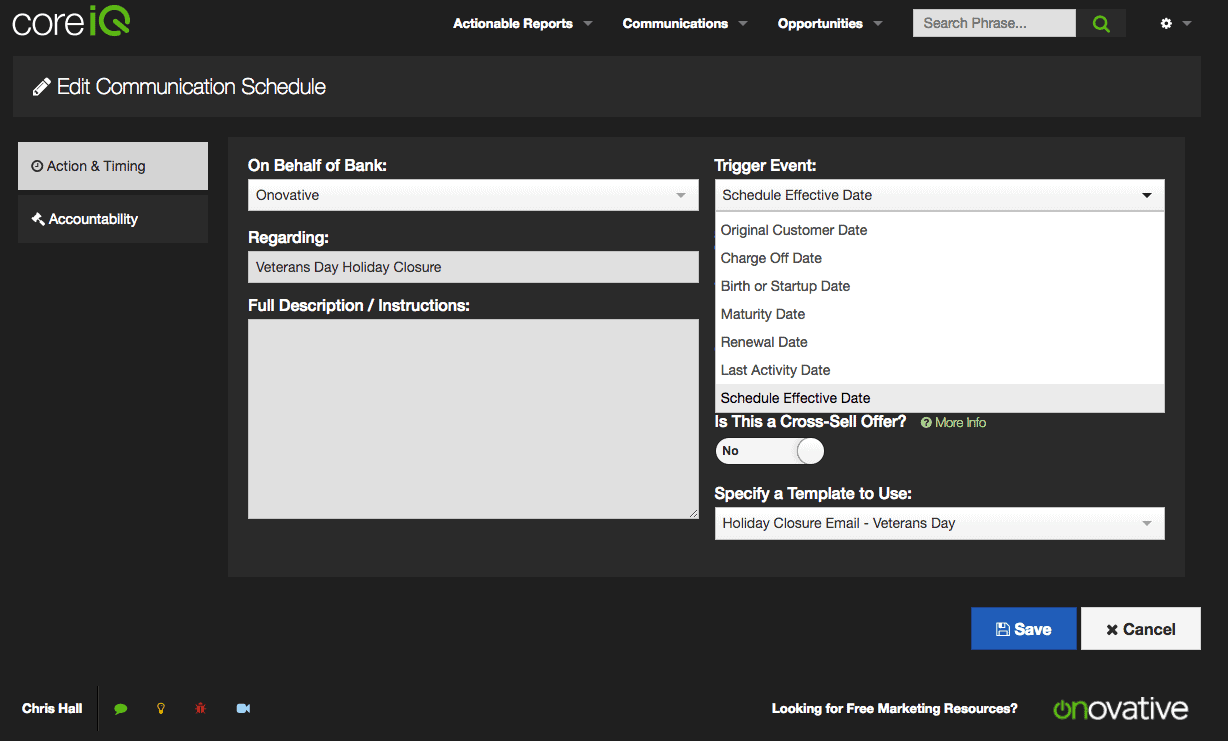
ACTION & TIMING
This is where we’re going to set the timing of the communication based on a trigger event and connect it to one of our templates.
Regarding: I chose a naming convention.
Full Description / Instructions: It may be helpful for you to jot down some notes about this specific holiday communication in this area, but you don’t have to use it either.
Trigger Event: In this case, we would like Core iQ to send out emails based on a calendar date. So I’ve chosen “Schedule Effective Date” from the menu and set the date that I want the email to go out.
It’s generally a best practice to send out holiday notifications a couple days before the holiday. For example, if the holiday falls on a Monday, then sending out emails the Thursday or Friday prior to the Monday holiday works out well.
Specify a Template to Use: If your templates have been approved through your compliance process and made active in Core iQ, you’ll be able to select them from this dropdown menu. This is where a naming convention comes in handy because your templates will appear in alphabetical order.
When I’m done with this screen, I can click on the “Accountability” tab to finish this communication, save it, and move on to the next one.
ACCOUNTABILITY
The last thing I need to do here is set the accountability of this message. So I’ll need to click the “Accountability” tab in the left-hand menu.
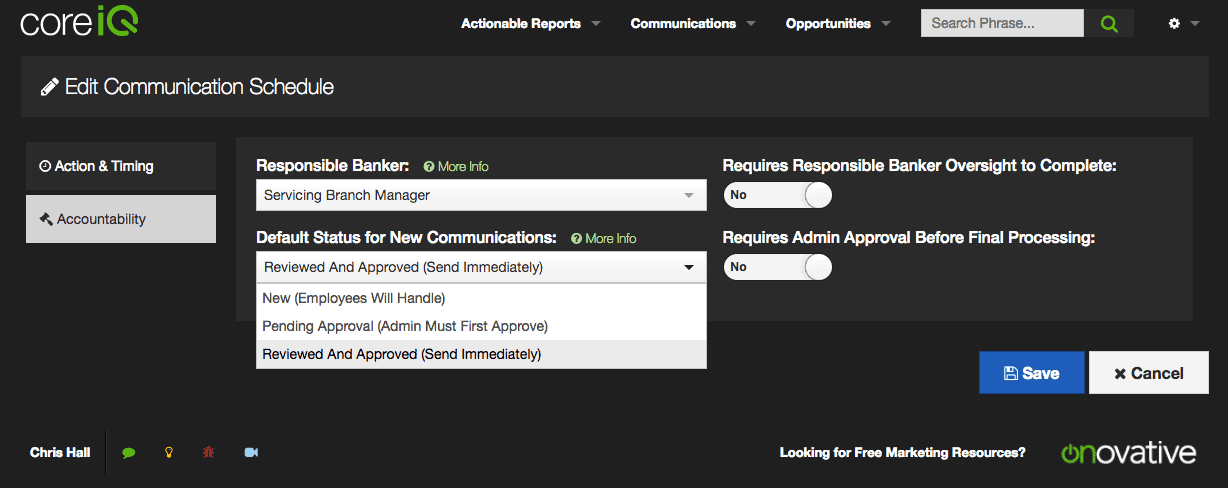
Responsible Banker: Here we can select who we want the communication to come from, and we have some options. Remember that when I was making my templates, I decided that these communications would come from the default email account from my financial institution.
If that’s the case for you, then you don’t have to do anything with this dropdown menu.
Core iQ’s template setting overrides the Responsible Banker Setting, so even though it appears that I’ve selected the “Servicing Branch Manager”, the Veterans Day template I selected in the “Action & Timing” screen will determine who the communication comes from.
As long as you’re not using any employee merge fields, the communication will appear to be coming from your financial institution’s default email address.
Default Status for New Communications: Since we’re sending these communications out on behalf of the financial institution, there is no need for any further personalization. So I’ve selected, “Reviewed And Approved (Send Immediately)”.
This means that my holiday email will go out automatically on the calendar date I’ve chosen. There’s nothing more I have to do here, except…
RINSE & REPEAT We’re going to want to repeat this process for every Federal holiday, which honestly should take about five to ten minutes.
When it’s all said and done, your communication plan should look something like the screenshot below.
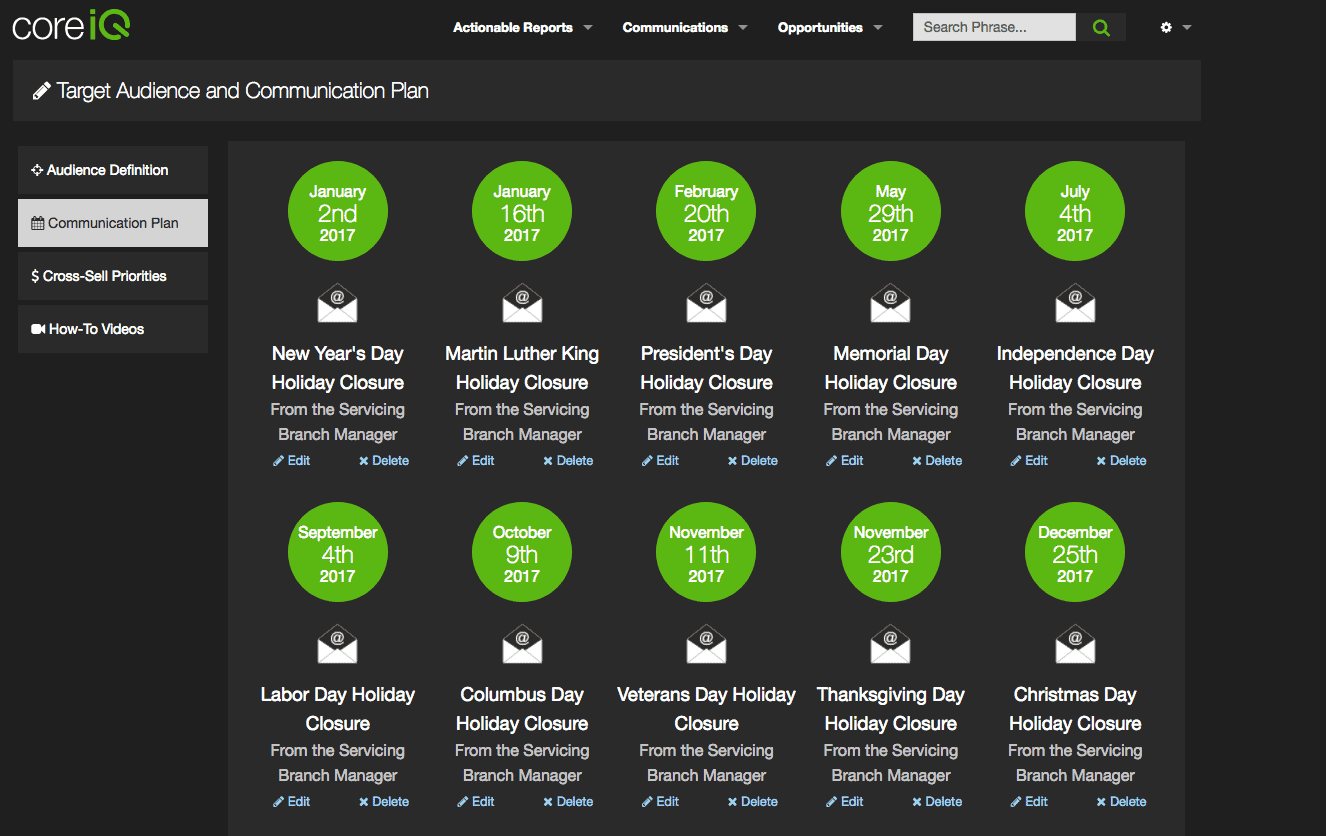
Congratulations!
You now have an automated way to send holiday greetings, while reminding your customers or members of your holiday hours. There’s nothing more for you to do this year.
Next year, you’ll have to decide if you want to change the images or messaging in your email templates and update the dates on each communication touchpoint. But that’s a small price to pay for a year’s worth of work that you can just forget about for the rest of the year…
Enjoy the time savings.

Holiday Marketing Collateral
Want all the free social content shown below as well as email templates and suggested copy for every holiday?

